
Hi Guys! Happy Happy Wednesday! It’s officially the middle of the week, and y’all. I literally can’t wait for the weekend! We’re taking our annual day trip to Frankenmuth and I’m seriously counting down the seconds! But I’m not here to talk about my upcoming plans… I’m here to talk about DIYs!
If you’ve been around for awhile, you KNOW your girl loves a good DIY. I’ve done plenty on this blog, and have plenty more planned for you! While, I love a DIY that takes me all day to do while I watch Christmas movies, I also love DIYs that are cheap, quick, and sentimental.
And this one my friends, is all three of those things.
Ever since Trev officially put a ring on my finger, I was looking at unique ways to preserve my wedding bouquet. I knew my bouquet was big enough I could probably do two or three things with it. A while back, I shared this Wedding Bouquet Shadow Box with all of you. I’m still as obsessed with mine as the day I made it. It just looks so dang pretty sitting on my shelf! Well, when all was said and done, I still had quite a bit of my bouquet left.

So I put it in an airtight container and sat it awhile until now.
Now, if there is anything I love more than DIYs, you KNOW it’s Christmas. And this my friends, is the simplest, easiest way to bring a little bit of your wedding with you into the Christmas season.
I’m sure you’ve seen this idea ALL over Pinterest. And honestly, I think it’s genius. It’s such a simple, fast, and easy way to remember your special day!
Are you ready to take your bouquet from this…
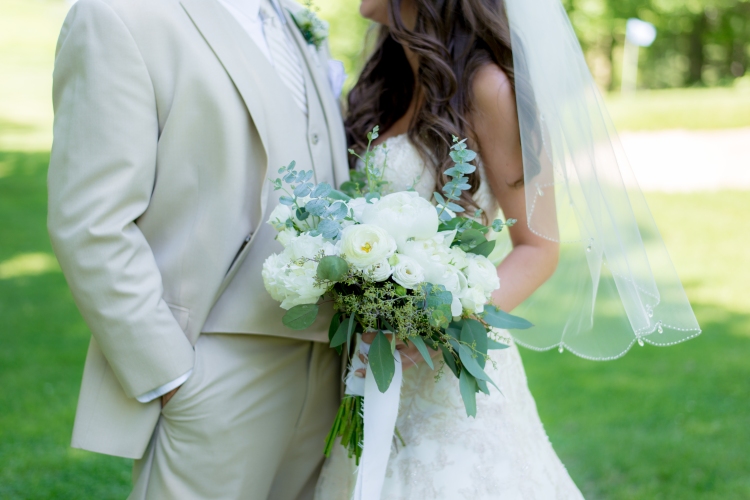
to this Wedding Keepsake Ornament!

What You’ll Need
Dried Bouquet
Ribbon
Clear Ornament from the Dollar Tree
Alright guys. I’m sure this needs ZERO explanation, because this DIY really is that easy! But, I’m going to explain it to ya anyways.
Grab your clear ornament (You can buy these all over the place, especially at Christmas time. But I grabbed mine at the Dollar Tree because it was literally A DOLLAR.) and begin to fill it with pieces of your bouquet. I had tiny little roses as part of mine, so I was able to put them in whole. If you had bigger flowers, you may need to put in petals rather than the entire flower. I also ripped off some leaves and put in pieces of the eucalyptus stems I had in mine. You can fill all the way to the top, or you can just put a few pieces in. Whatever you like the best!
Once you’ve filled your ornament, put the silver top back on, and then use a ribbon to tie a bow at the top. I used the bow that was around my actual bouquet. It’s kinda too big for the ornament, but I used it for it’s sentimental value, not for it’s “perfectness”.
And guys… that’s literally it. SO SIMPLE RIGHT?! I mean, I know I’ve said all my DIYs on here are simple, but this one is literally a 2 second project that my Preschoolers could do. And not only is it crazy simple, it’s really beautiful too!
How did you preserve your wedding bouquet?!
Alright friends. I’m off to work. I’m feeling SUPER sleepy today. Hopefully I don’t fall asleep at nap time too 😉
Xx.
Savannah

Omg your bouquet was beautiful! I’m currently planning my wedding so thank you so much for sharing!
LikeLiked by 1 person
Thank you! Happy Wedding Planning! Enjoy every minute of it 🙂
LikeLiked by 1 person
Thank you ❤️
LikeLiked by 1 person